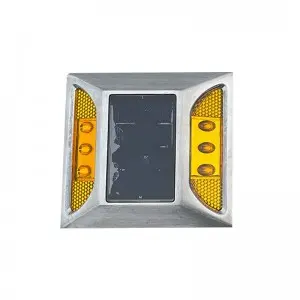
Road studs are traffic safety facilities fixed on the road, used independently or in conjunction with markings, to guide vehicles and pedestrians to pass smoothly by transmitting lane information through shape, color and reflected light. Road stud is fixed on the road to play a role in marking the raised sign block. It can be used to mark out the boundary of the opposite lane, the boundary of the same lane, the boundary of the lane, etc. It can also be used to mark out curves, entrance and exit lights, inflow markers, narrow roads, road obstacles and other dangerous roads.
Features
When driving at night, the road studs produce reflected light under the illumination of headlights, clearly depicting the outline of the road in front of the vehicle and making people feel happy. The use of reflective eye-catching road signs not only brings safety and speed to road traffic at night, but also creates a beautiful scene, bringing comfort and happiness to passengers. Therefore, they are widely used in countries all over the world, especially in developed countries.
Installation method
1.Placement and installation of safety isolation facilities, in the whole process of construction, whether it is a new road, or has been opened to traffic, all should be in the safety facilities, such as construction in the open road, the ratio of safety personnel and installation personnel should be 1:1. not open to traffic road construction, the ratio of safety personnel and installation personnel should be 1:3.
2. Determine the installation position and make sure the installation position is flat. For roads with expansion and contraction, pinch joints and unevenness, the road surface should be finished and leveled beforehand.
3. Clean the installation position with a brush, and make sure the installation position is dry.
4. Take an appropriate amount of glue and apply it evenly on the road studs.
5. Press the nail firmly on the installation position to ensure the correct direction, if the glue is too much, be sure to clean up.If it is cast aluminum with foot nails, to ensure that the depth of the hole is greater than the depth of the nail foot 1 cm, the hole diameter is greater than the diameter of the nail foot 2 mm.
6. Nail installation is completed within two hours to do a walk-through to ensure that all the nails are not installed backwards, installed crooked or pressed crooked.
7. Wait for 4 hours after the nail curing, remove the installation of isolation facilities.
Post time: Jan-23-2024

